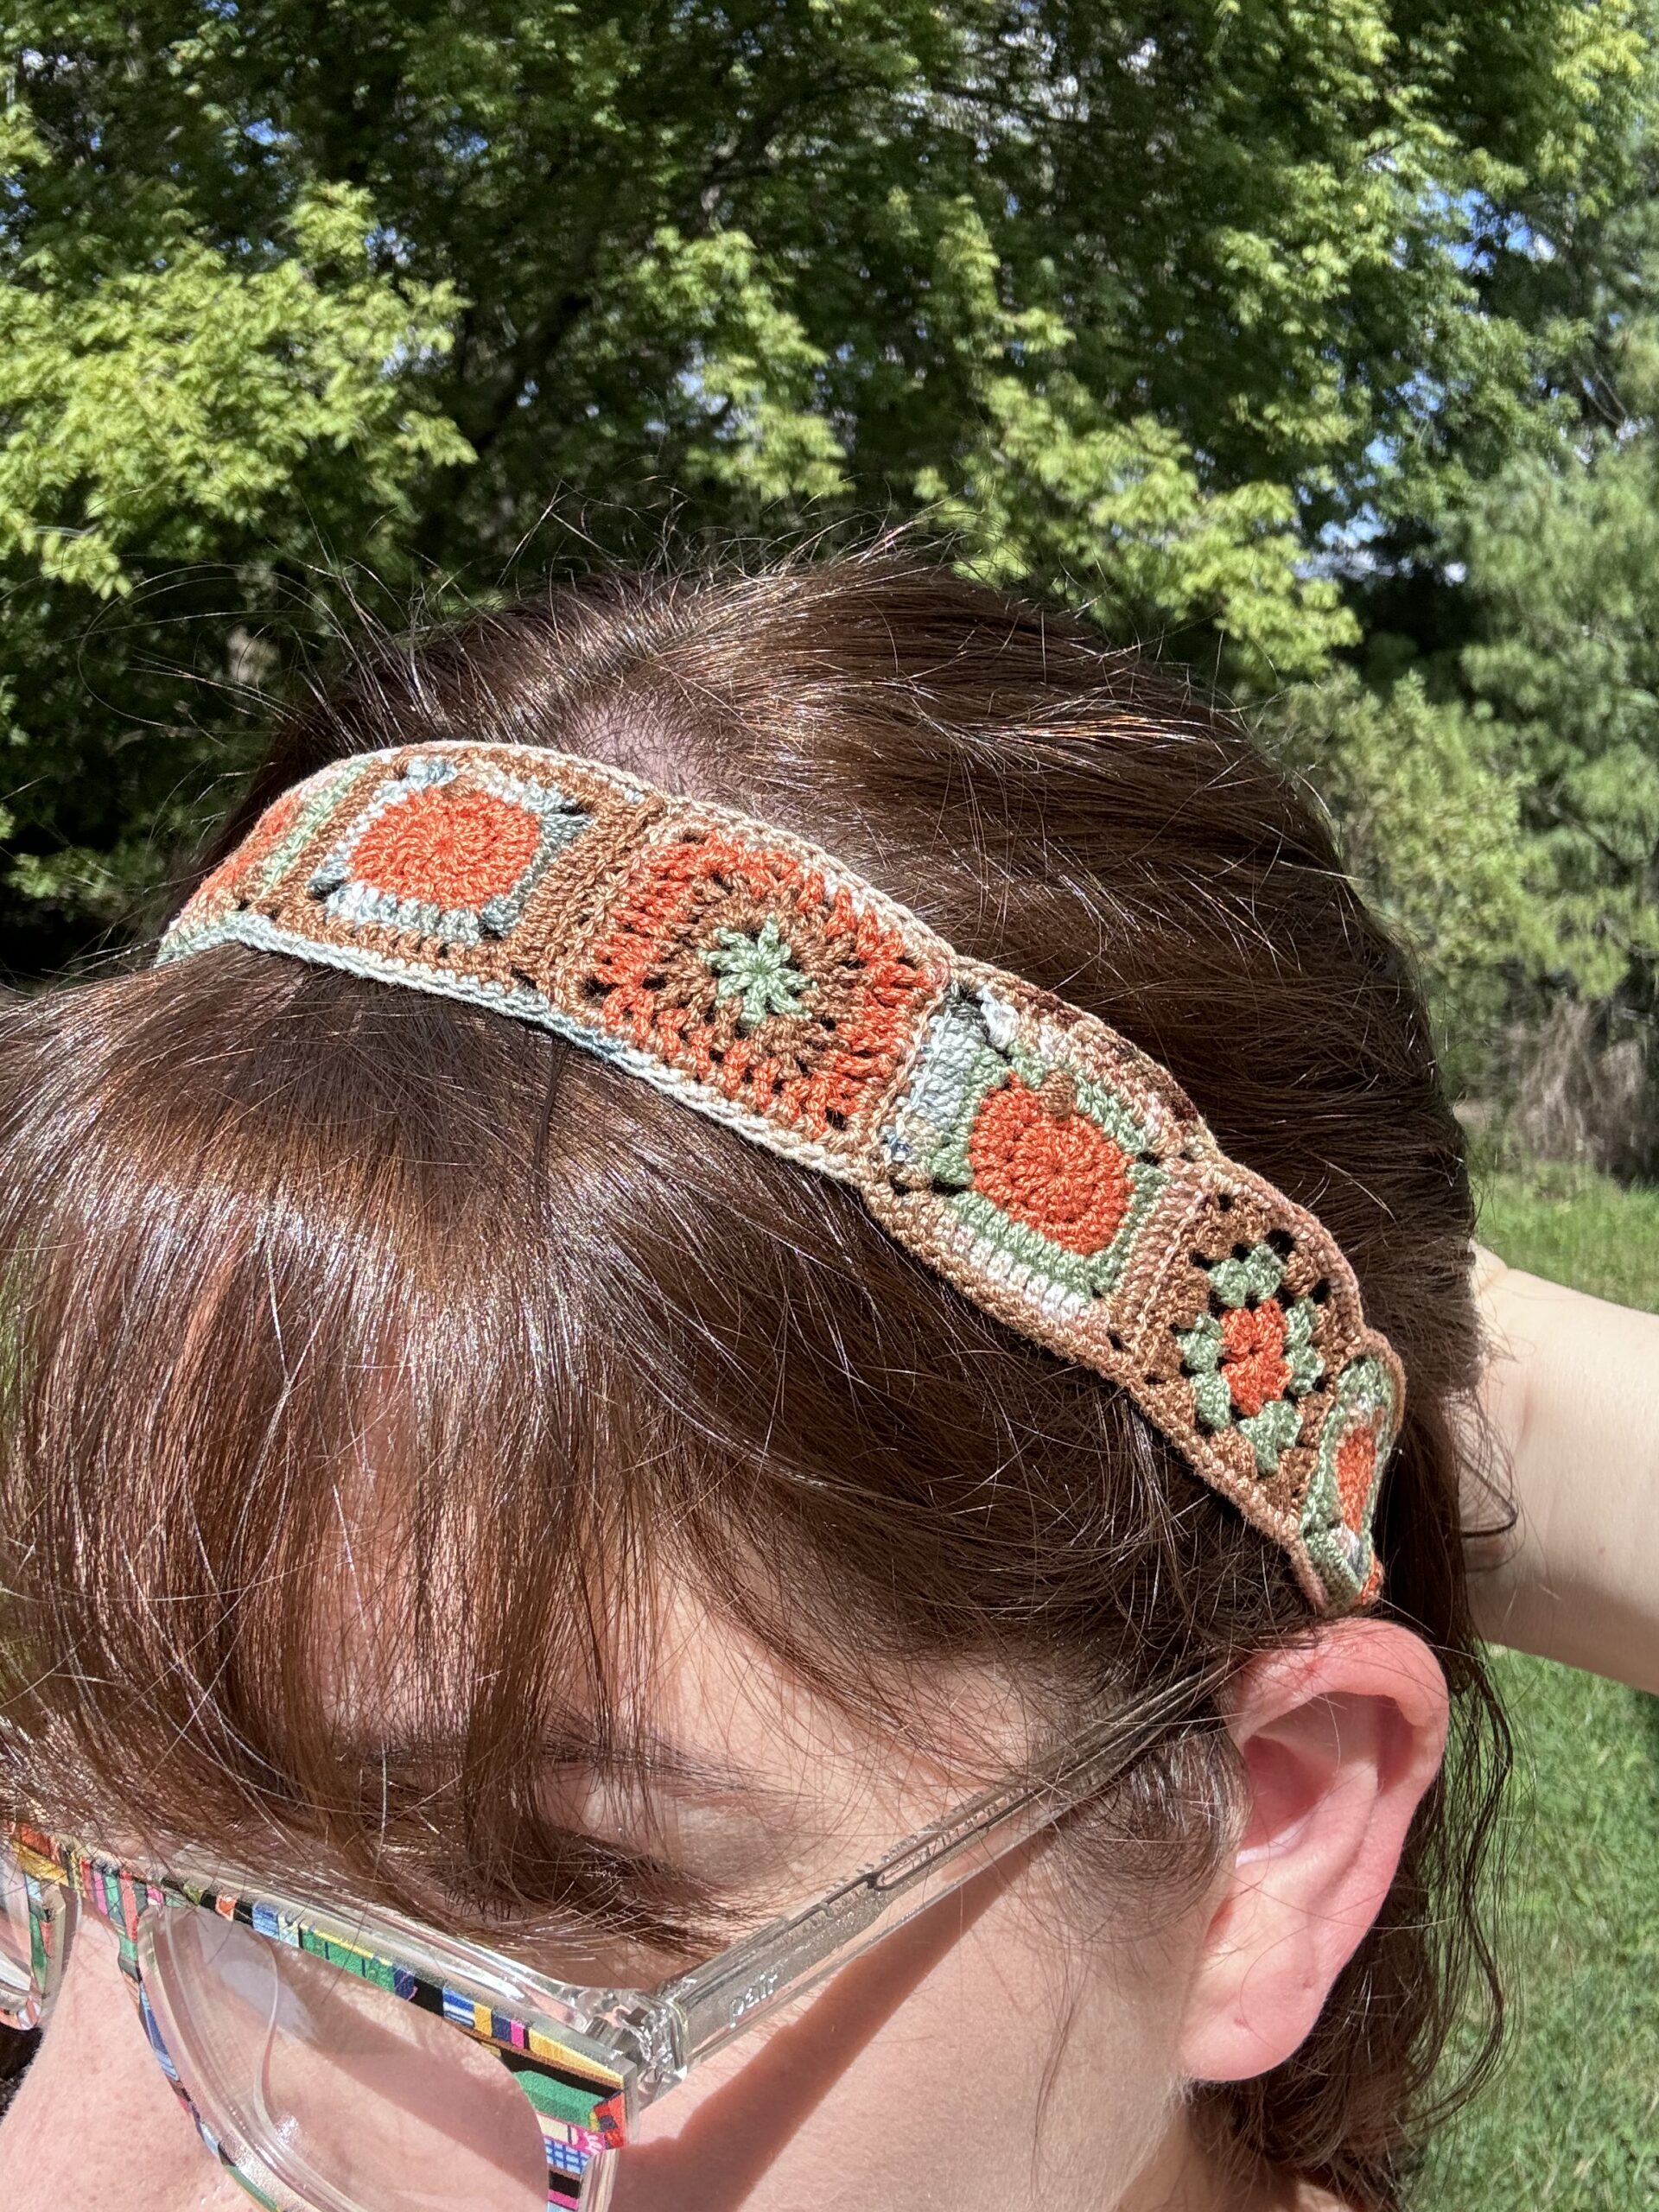

This adorable fall accessory is easy to make and totally customizable!
I used four different colors of #10 crochet thread and a 1.5mm crochet hook. If you use a different size yarn or hook you may end up with a different size so I would recommend measuring carefully as you go to ensure the headband will fit comfortably.
There are three different square patterns for this project, but you can use whichever ones you like in whatever order you prefer. It’s totally up to you!
Pumpkin Granny Square
The first square pattern I made is the Pumpkin square. For this square you will want three colors but make sure one of them is orange. You will also need a little bit of brown for the stem so make sure your second color is something other than brown.
Round 1: Make a magic ring, ch 2, 12 dc, join with slst.
Round 2: ch2, 2 dc in next 4 st, 2 sc in next two st, 2 dc in next 4 st, 2 sc in next 2 st, join changing color.
Round 3: ch 2, 2dc, ch 3, 2 dc, sc 4, 2 dc, ch 3, 2 dc, dc 4, 2 dc, ch 3, 2 dc, sc 4, 2 dc, ch 3, 2 dc, dc 4, join changing color.
Round 4: ch 2, dc 2, *[2 dc, ch 3, 2 dc] in ch 3 space, dc 8*, repeat ** twice, [2 dc, ch 3, 2 dc] in next ch 3 space, dc 6, join, fasten off.
Using your brown thread, sew a stem in round 3, any size you like and weave in all of your ends.


Starburst Variation Granny Square
Round 1: magic ring, ch 2, [dc, ch1] 8 times, join with a slst changing colors.
Round 2: ch 2, *[dc, ch 1, dc, ch 3, dc, ch 1, dc, ch 1] all in the next ch 1 space, dc, ch 1*, repeat ** repeat three more times, join changing color.
Round 3: ch 2, dc ch 1, *[dc, ch 1, dc, ch 3, dc, ch 1, dc, ch 1] all in the ch 3 space, [dc, ch 1] in the next 4 spaces*, repeat ** twice, [dc, ch 1, dc, ch 3, dc, ch 1, dc, ch 1] in next ch 3 space, [dc, ch 1] twice, join changing color.
Round 4: ch 1, sc in each of the ch 1 spaces and 4 sc in each of the ch 3 spaces all around, join and fasten off.


Classic Granny Square
Round 1: Magic ring, ch 5, 3 dc, ch 3, 3 dc, ch 3, 3 dc, ch 3, 3 dc, join to beginning ch with slst changing color.
Round 2: ch 2, [3 dc, ch 3, s dc, ch 3] in ch 3 space, repeat [] three times, join changing color.
Round 3: ch 5, *[3 dc, ch 3, 3 dc] in next ch 3 space, ch 3, 3 dc in next ch 3 space, ch 3* repeat ** twice, [3 dc, ch 3, 3 dc] in next ch 3 space, ch 3, 3 dc in next ch 3 space, join, fasten off.


Putting it all together
I made a total of 11 squares, 5 pumpkins, 4 starburst, 2 classic, but you can make any variation you want. If you used a different size thread/yarn or a different size hook you may need more or less squares. I wanted the squares to go from ear to ear rather than all the way around my head so, although I measured about 22 inches around my head, I only needed about 15 inches of squares.

After lining up the squares in the order I wanted them I chose the multicolored thread to sew the sides together. Once sewn I used the same thread to sc all the way around the headband once.

Once all the squares were attached I used the same thread, joining to the side of the headband to sc 11 sts for four rows. Then decrease at the beginning and end of the next row so you only have 9 st for four more rows. Continue to decrease the first and last stitches every 3 or 4 rows, depending on the size headband you want. Once you get to the end and only have 3 stitches left, sc a few more rows and then wrap the end around a hair tie and sew around the hair tie. Repeat this whole process on the other side of the headband.


I would recommend not weaving in the ends until you have tried the headband on and know if you need to make adjustments.
I hope this pattern was helpful! Leave a comment if you have any questions. Happy yarning!

